
If you’ve noticed blemishes, imperfections or marks on recent print jobs, don’t fret as the problem is unlikely to be a mechanical one. Like most electronic hardware in the home or office, inkjet printers require regular maintenance to keep them in tip-top condition and working at their best. Neglect to clean your printer at methodical intervals, and not only will the quality of future printouts be affected – you risk shortening the lifespan of your machine.
Whilst we’d recommend having your printer cleaned by a professional at least once a year, here’s a step-by-step guide on how to keep tabs on the cleanliness of your inkjet printer in the meantime.
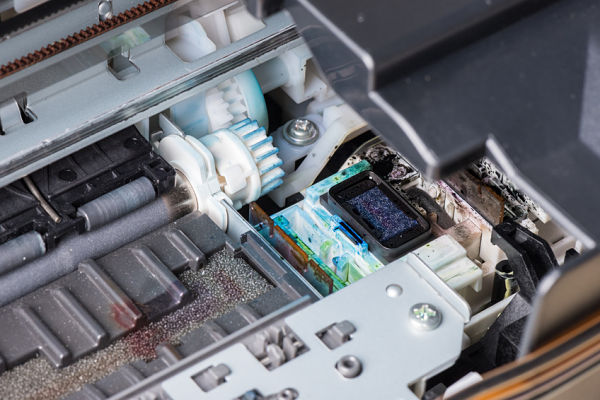
What You’ll Need
Given that inkjet printers use liquid-based ink during the print process, there are a number of items you’ll need prior to cleaning to ensure you, your clothes and your carpet remain entirely stain-free.
Paper Towel/Kitchen Roll: Disposable and durable, paper towel or kitchen roll is perfect for removing stubborn dirt and grim from internal components, as well as excess ink from print cartridges.
Quality Window Cleaner: Window cleaner cuts through ink stains and dried on residue to leave a clean, blemish-free finish.
Printer Oil: Designed to lubricate internal components, printer oil is an essential part of regular printer maintenance, and should be applied after cleaning.
Protective Gloves: Ink is notoriously difficult to remove from the skin; wear protective gloves to avoid an afternoon’s worth of skin scrubbing.
How to Clean Your Inkjet Printer in 6 Easy Steps
Once you’ve acquired all of the above tools and equipment, it’s time to cue the music and get to work. At this point, we thought it prudent to mention that internal printer components are fragile, and any subsequent damage expensive to repair. If in doubt, contact your local printer maintenance professional.
Step 1: Remove the Ink Cartridges and Switch Off the Machine
In order to remove ink cartridges from an inkjet printer, the cartridge housing often needs to be positioned in the centre of the stabiliser bar. On most printers, if you open the front of the machine, the housing will often reposition itself automatically – allowing you to extract the cartridges. Once you’ve done this, switch the printer off at the mains.
Step 2: Clean the Cartridges
Once you’ve removed the cartridges from the printer, you’ll probably find they’re clogged with excess ink around the print head. To remove this, take a square of paper towel, spray with window cleaner, and gently wipe the cartridge, taking care to remove any and all excess ink. When you’re happy all ink has been removed, set to one side on another sheet of paper towel.
Step 3: Clean the Ribbon
The ribbon is an integral component of the inkjet printer, and it should be cleaned regularly to ensure optimum functionality. Using a square of paper towel soaked in window cleaner, gently wipe any ink or debris from the ribbon. Be sure to do this gently – inkjet ribbons are notoriously fragile, and costly to repair or replace should any damage occur.
Step 4: Clean the Cartridge Housing
Given that the cartridge housing holds the ink cartridges in place, naturally it is prone to accumulating dirt and grime. Using a paper towel (as well as cotton swab for those hard to reach areas), wipe the cartridge housing with window cleaner to remove ink, grime and debris.
Step 5: Oil the Stabiliser Bar
Running directly through the centre of the printer, the stabiliser bar allows the ink cartridges to travel back and forth across the page, distributing ink where appropriate. To ensure complete functionality and smooth operation, it’s important to oil the stabiliser bar regularly. To do so, decant a couple of drops of printer oil onto the bar, before manually moving the cartridge housing a long the bar to spread the oil evenly.
Step 6: Re-Insert the Cartridges
Once you’re happy that all visible dust, dirt and grime has been removed from your printer, switch it back on at the mains and re-insert the cartridges. Then, run any cartridge realignment checks as recommend by the manufacturer – and you’re done.
For more expert help and advice on printer maintenance, visit the Toner Giant Blog. Alternatively, click here to visit our homepage, where you’ll find a comprehensive range of printers and print consumables.
I have been working in the printing industry with TonerGiant for over 18 years, and I'm the resident technical printer expert, helping people fix their printer problems for over 16 years. I have taken part in many training courses with HP, Samsung, Brother, Canon and Xerox to further my knowledge, and I'm also the Digital Marketing Manager at TonerGiant.co.uk (degree qualified).
Hi you didn’t mention epson have you’ve repaired any I have a epson eco Tank my kids love to print stuff drawing paper 3d figures anyway my printer won’t grab paper it keeps saying the paper feeder is out of paper but it clearly isn’t i want to know what I can do to fix this problem without having to go take it to get it repaired this is a really good printer and I can’t afford a new one
Hi Patricia, with paper feeder issues it’s normally one of a couple of things. It could be that there is too much paper in the feeder and the paper is slipping as it tries to grab (try to only put a small amount of paper in the feeder), it could be torn paper trapped in the printer somewhere or it could be more of a problem with the mechanical parts of the printer in which case you would need a technician to look at it.
My Epson prints blurred,faint lines alternatively. What could be the issues and how do I go about it?
try the tips on the following: https://www.tonergiant.co.uk/blog/2022/04/why-is-my-printer-printing-lines-how-to-fix/